Stop Missing Leads! Automate WhatsApp Lead Capture to HubSpot CRM with AI (A Step-by-Step Guide)
Automate WhatsApp lead capture to HubSpot CRM 24/7 with AI! Never miss leads outside business hours. Get our step-by-step integration guide using 2Chat, n8n & OpenAI for business owners & marketers.
As a busy digital marketing professional, business owner, startup founder, or entrepreneur, you know that every lead counts. But what happens when those leads reach out via channels like WhatsApp after business hours? Do they get an immediate response, or do they hit a wall until the next day?
Missing out on after-hours inquiries means missing out on potential customers. But constantly monitoring messaging apps 24/7 just isn't sustainable (or healthy!).
The good news? You can leverage the power of AI and automation to create a tireless lead-capturing agent that works around the clock and feeds directly into your HubSpot CRM. This means no more missed opportunities and higher quality leads ready for your team when they're back online.
In this tutorial, we'll break down how to build a conversational AI agent that lives on WhatsApp, collects lead information even outside of business hours, and automatically creates new contacts in your HubSpot CRM. We'll be using a powerful stack: WhatsApp (via 2Chat), n8n for automation, OpenAI for the AI smarts, and HubSpot CRM to keep everything organized.
Let's dive in and see how you can set this up for your business.
The Tech Stack Powering Your AI Lead Agent
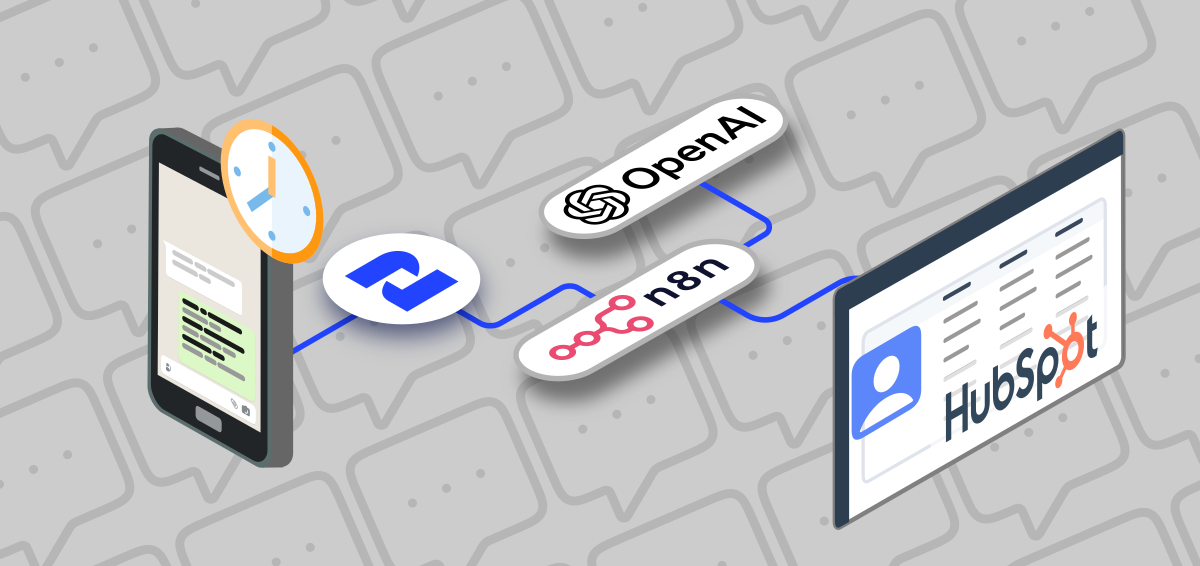
Before we get into the how, let's quickly look at the tools involved and their roles:
- WhatsApp (via 2Chat): Your direct line to customers. 2Chat is used here to manage the WhatsApp business channel and conversation flows.
- n8n: The automation engine that connects everything. It receives messages, talks to the AI, and sends data to HubSpot. Think of it as the central nervous system.
- OpenAI: Provides conversational intelligence. This AI model understands the user's messages and, guided by n8n, extracts the necessary lead information.
- HubSpot CRM: Your database. This is where all the captured lead information will be stored neatly as new contact records.
Setting the Stage in Your HubSpot CRM
The first crucial step is to prepare your HubSpot account to receive data from our AI agent.
Create a "Base" Contact:
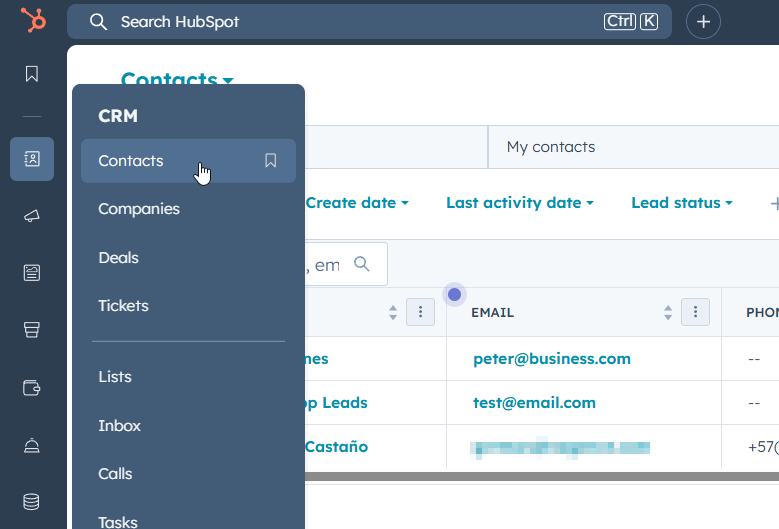
- Navigate to your Contacts in HubSpot.
- Create a new contact record specifically for leads coming in via WhatsApp. You might name it something like "WhatsApp Leads" or similar.
- Why do this? This gives you a central contact record to associate all incoming WhatsApp leads with. This helps you quickly identify leads originating from this channel and keeps your main contact list more organized and up-to-date.
- Find this "WhatsApp Leads" contact and make a note of its Record ID. You'll need this unique identifier later to link new leads to it. (As shown in the video, you can find this by going to the contact's properties and searching for "Record ID").
Create a HubSpot Private App:
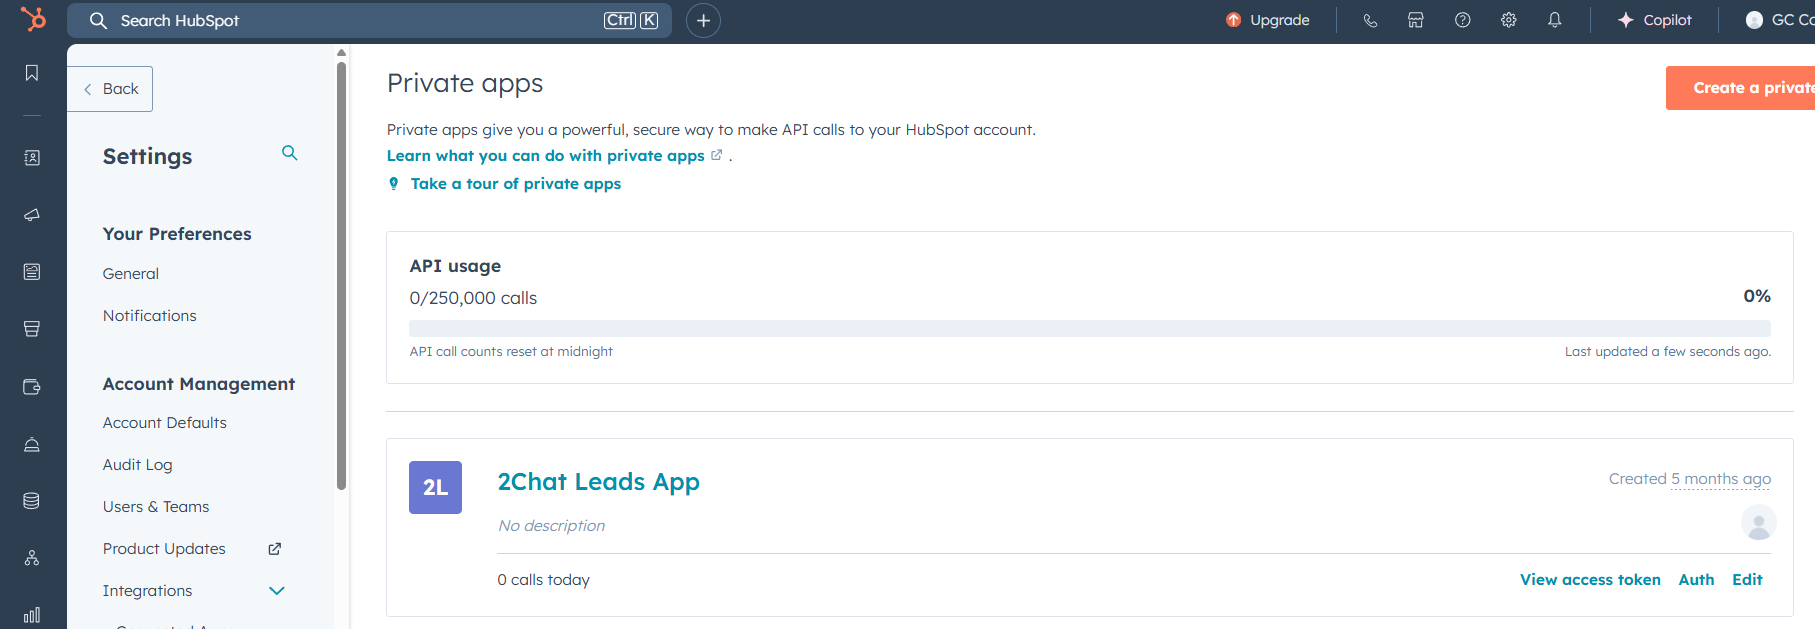
- A Private App allows n8n (or any external tool) to securely interact with your specific HubSpot account via the API.
- Go to Settings (the gear icon).
- Under Integrations, find Private Apps.
- Click Create a private app.
- Give it a descriptive name, like "2Chat Leads App" or "WhatsApp Lead Capture".
- Crucially, set the API Scopes. This determines what the app can see and do in your HubSpot. For lead capture and association, you'll need the following permissions under the CRM section:
crm.objects.contacts.readcrm.objects.contacts.writecrm.schemas.contacts.readcrm.schemas.contacts.write- Click Create app. HubSpot will generate an Access Token. This is your secret key! Copy this token and keep it secure. You'll need it to authorize n8n's requests.
Building the Automation Workflow in n8n
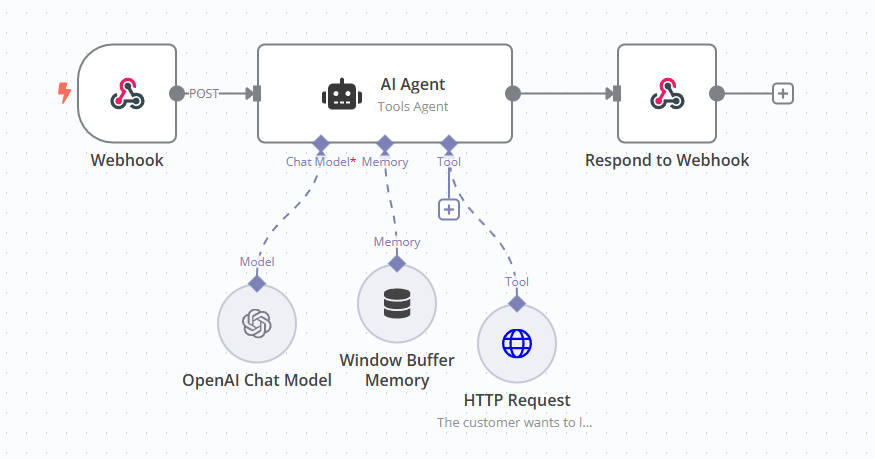
Now, let's assemble the brain of our operation in n8n. The video shows a simple workflow: Webhook -> AI Agent -> Respond to Webhook (after sending data to HubSpot).
Start with the Webhook Trigger:
- Add a Webhook node to your n8n workflow.
- Set the HTTP Method to POST.
- Give it a Path (e.g.,
/hubspotlead). This path will be part of the URL you'll give to 2Chat. - Under Respond, select Using Respond to Webhook Node. This tells the webhook to wait for a response from a specific node later in the workflow.
- Activate the workflow to get the Production URL. Copy this URL. This is where 2Chat will send messages.
Add the AI Agent:
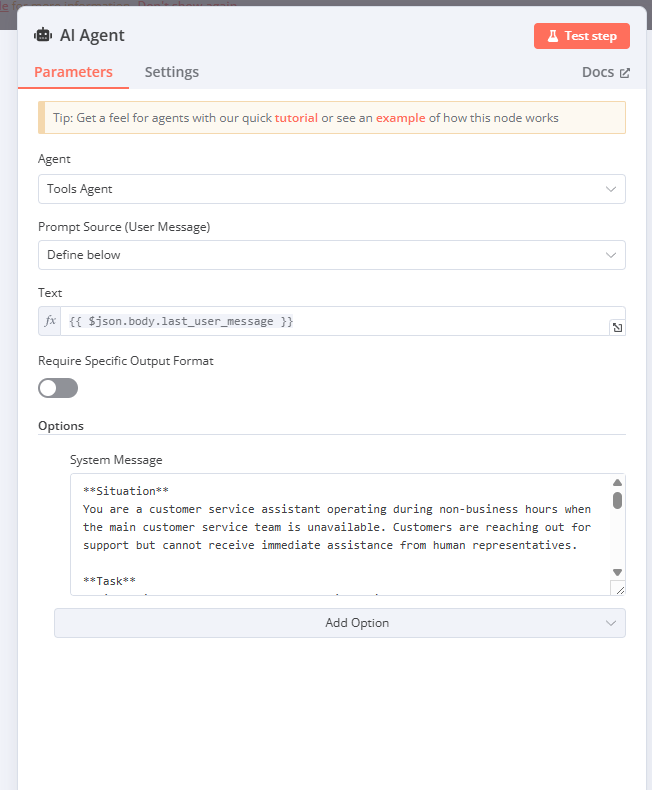
- Add an AI Agent node.
- Choose Tools Agent as the Agent type.
- For Prompt Source, select User Message. The text will be
{{$json.body.last_user_message}}(This pulls the actual message text from the data sent by 2Chat). - Under System Message, write instructions for your AI agent. This prompt is critical for defining its behavior. The video uses a prompt like:
**Situation:**
You are a customer service assistant operating during non-business hours when the main customer service team is unavailable. Customers are reaching out for support but cannot receive immediate assistance from human representatives.

**Objective:**
Maintain excellent customer service standards during off-hours by ensuring customers feel heard and valued while systematically collecting all necessary information needed for the customer service team to follow up effectively. Your goal is to enable proper follow-up during business hours.

**Task:**
Information needed for the customer service team to follow up effectively:
- Customer first name
- Customer last name
- Company where the customer works for
- Contact email
- Phone number for contact using call or WhatsApp

When you collect all required contact information (by asking for each parameter in separate, individual questions), ensure you gather every piece of information needed for the customer service team to follow up effectively.

When you create the lead using the corresponding tool, politely inform the user that customer service will contact you as soon as possible and say good-bye.
You can customize this prompt to fit your specific business needs.
- Make sure the AI Chat Model and Memory nodes are connected to the AI Agent. A Window Buffer Memory is recommended to keep the conversation context.
Add the HTTP Request Node (Sending Data to HubSpot):
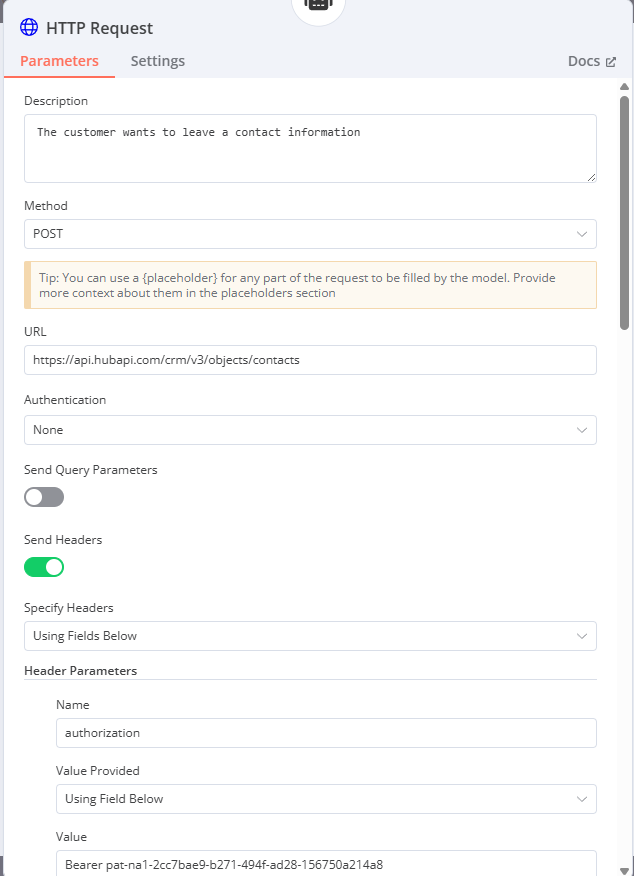
- Add an HTTP Request node.
- Set the Description to something like "Send contact info to HubSpot". This description is important as the AI Agent will use it to decide if this is the right tool to use.
- Set the Method to POST.
- Set the URL to the HubSpot Contacts API endpoint for creating/updating contacts:
https://api.hubapi.com/crm/v3/objects/contacts. - Under Send Headers, turn the toggle on.
- Add two Header Parameters:
- Name:
Authorization, Value Provided:Using Field Below, Value:Bearer YOUR_PRIVATE_APP_TOKEN(ReplaceYOUR_PRIVATE_APP_TOKENwith the token you copied from HubSpot). - Name:
Content-Type, Value Provided:Using Field Below, Value:application/json - Under Send Body, turn the toggle on.
- Set the Specify Body to Using JSON Below.
- Here you'll paste the JSON structure for creating/updating a contact and linking it. This is where you use the Placeholder Definitions the AI needs to fill. Referencing the video and HubSpot API docs, the structure looks something like this (using the example placeholders):
{
  "associations": [
    {
      "to": {
        "id": "YOUR_WHATSAPP_LEADS_CONTACT_ID"
      },
      "types": [
        {
          "associationCategory": "HUBSPOT_DEFINED",
          "associationTypeId": 449
        }
      ]
    }
  ],
  "properties": {
    "firstname": "{{$json.firstName}}",
    "lastname": "{{$json.lastName}}",
    "company": "{{$json.company}}",
    "email": "{{$json.email}}",
    "mobilephone": "{{$json.phoneNumber}}",
    "hs_whatsapp_phone_number": "{{$json.phoneNumber}}"
  }
}
Replace YOUR_WHATSAPP_LEADS_CONTACT_ID with the Record ID of the "WhatsApp Leads" contact you created in HubSpot.
- Under Placeholder Definitions, click "Add Definition" for each piece of information you want the AI to extract and fill in the JSON body.
- Placeholder Name:
firstName, Description:Customer first name, Type:String - Placeholder Name:
lastName, Description:Customer's last name, Type:String - Placeholder Name:
company, Description:Company where the customer works for, Type:String - Placeholder Name:
email, Description:Contact email, Type:String - Placeholder Name:
phoneNumber, Description:Phone number for contact using call or Whatsapp, Type:String - You can add more placeholders for other HubSpot fields you want to capture.
- Connect the AI Agent node's output (the extracted data based on placeholders) to the HTTP Request node's input.
Add the Respond to Webhook Node:
- Add a Respond to Webhook node.
- Set Respond With to the First incoming item.
- Connect the AI Agent node's output to this node. This sends the AI's conversational response back to 2Chat.
Activate Your n8n Workflow: Make sure your n8n workflow is set to Active.
Configuring the 2Chat Conversation Flow
Finally, let's set up the 2Chat side to trigger the n8n workflow and handle the conversation.
- Create a Conversation Flow:
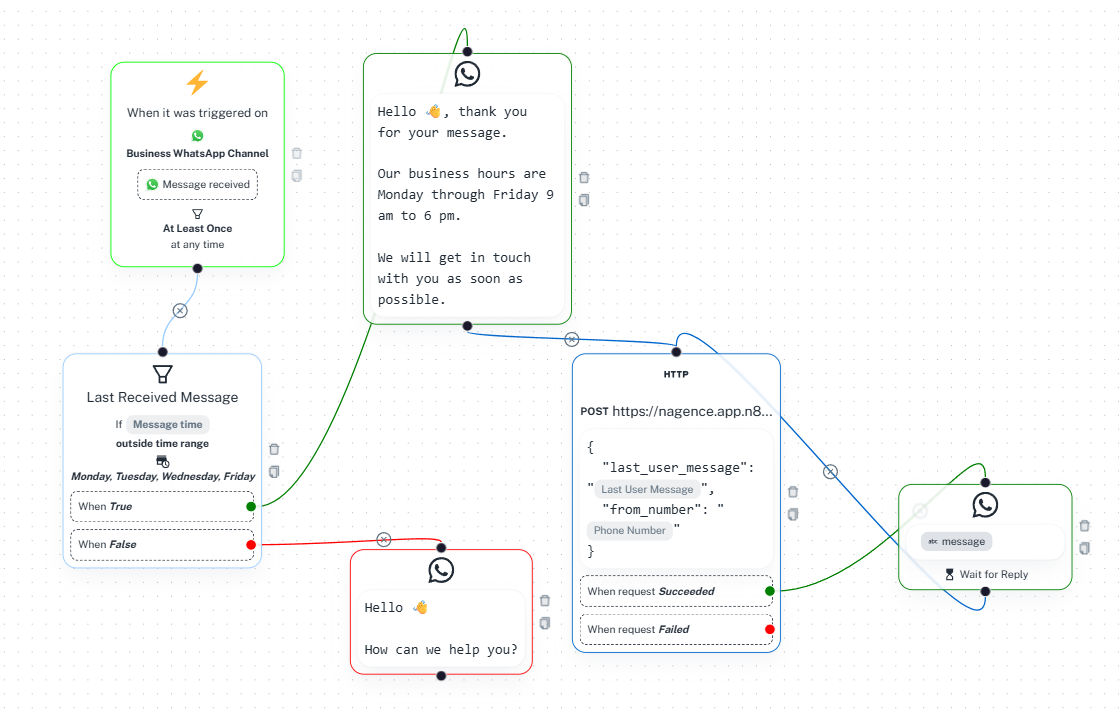
- In 2Chat, create a new Conversation Flow.
- Set the Initial Step trigger to When it was triggered on your Business WhatsApp Channel and a Message received.
- Add a "Send WhatsApp Message" node for the initial welcome message that's sent within business hours.
- Add a "Last Received Message" node immediately after the trigger.
- Configure the Condition editor for the "Last Received Message" node:
- Set If Message time to outside time range.
- Set the Time Range to your business hours (e.g., Monday to Friday, 9 AM to 6 PM). Make sure the Time zone is correct.
- Connect the "When False" branch of the "Last Received Message" node to your "Send WhatsApp Message" node (for the 'within business hours' message).
- Connect the "When True" branch (outside business hours) to an HTTP Request node.
- In the 2Chat HTTP Request node:
- Set Request Type to POST.
- Set Request URL to the Production URL of your n8n webhook (the one you copied earlier).
- Under Body, use
{{last_user_message}}to send the user's message text and{{wa.phoneNumber}}to send their phone number to n8n. The JSON body should look like:
{
  "last_user_message": "{{last_user_message}}",
  "from_number": "{{wa.phoneNumber}}"
}
- Connect the "When request succeeded" branch of the 2Chat HTTP Request node to a "Message and Wait for Reply" node.
- In the "Message and Wait for Reply" node:
- In the text area, reference the message output from your n8n AI agent. You'll use a placeholder like
{{your_n8n_ai_output_field}}. Based on the video's hint, n8n sends back a JSON with a field called "message". So, you'll use{{message}}if you map the n8n output to a custom field namedmessagein 2Chat (as shown at 15:06). - In the "Save reply in a Custom Field" section, map the n8n AI response output (
$outputin n8n's test response) to a 2Chat Custom Field. The video shows mapping$outputfrom the HTTP Request node's response to a Custom Field namedmessage. Thismessagecustom field is then used in the "Message and Wait for Reply" node. - Connect the output of the "Message and Wait for Reply" node back to the "Last Received Message" node. This creates a loop, allowing the conversation to continue until the AI agent finishes collecting information and provides its final response.
The Magic in Action: How It Works
- A potential customer sends a message to your WhatsApp business number.
- 2Chat receives the message and checks the time.
- If it's outside your specified business hours, the conversation flow routes to call your n8n webhook.
- The n8n webhook receives the user's message and phone number.
- The AI Agent processes the message using its system prompt and tools. It understands its goal is to collect specific contact information.
- The AI Agent uses its memory to maintain the conversation context and asks the user for their name, company, email, and phone number, one by one.
- As the user provides the information, the AI Agent extracts it.
- Once the AI has all the required details (as defined by the Placeholder Definitions in the HTTP Request node), it uses the HTTP Request node to send this data to your HubSpot CRM via the API.
- HubSpot receives the data, creates a new contact record (or updates an existing one if the email/phone matches), and associates it with your "WhatsApp Leads" base contact.
- The AI Agent generates a final polite message (e.g., confirming receipt and saying someone will follow up during business hours).
- This final message is sent back to 2Chat via the Respond to Webhook node.
- 2Chat sends the AI's final message to the user on WhatsApp.
- The conversation flow loops back to the "Wait for Reply" stage, ready for the next message from the user, while the lead data is already in your HubSpot CRM.
Why This Matters for Your Business
Implementing an AI agent like this isn't just cool tech; it's a smart business move:
- Never Miss a Lead: Capture valuable prospect information 24/7, even when your team is unavailable.
- Improved Data Quality: Automate the collection of essential contact details and ensure they land directly in your CRM.
- Boost Efficiency: Free up your team from monitoring after-hours messages and basic information gathering.
- Scalability: Easily handle a higher volume of initial inquiries without increasing staff immediately.
- Enhanced Customer Experience: Provide an immediate, albeit automated, response to show prospects you're available, even outside standard hours.
Key Takeaways
- Integrating WhatsApp (via 2Chat) with HubSpot CRM using n8n and OpenAI enables automated, after-hours lead capture.
- Setting up a base contact and a Private App with the correct scopes in HubSpot is essential for API access.
- n8n orchestrates the workflow, using a Webhook as a trigger, an AI Agent to process messages and extract data, and an HTTP Request node to send data to HubSpot.
- A well-defined System Message and Placeholder Definitions are key to guiding the AI Agent.
- Associating new contacts with a central "WhatsApp Leads" contact in HubSpot helps track the source.
- The 2Chat conversation flow manages the user interaction and routes messages based on conditions like business hours.
This setup might require a bit of initial configuration, but the benefits of automating your lead capture and ensuring no prospect falls through the cracks are well worth the effort. Now you can have an AI working for you, keeping your CRM populated with fresh leads, day and night!